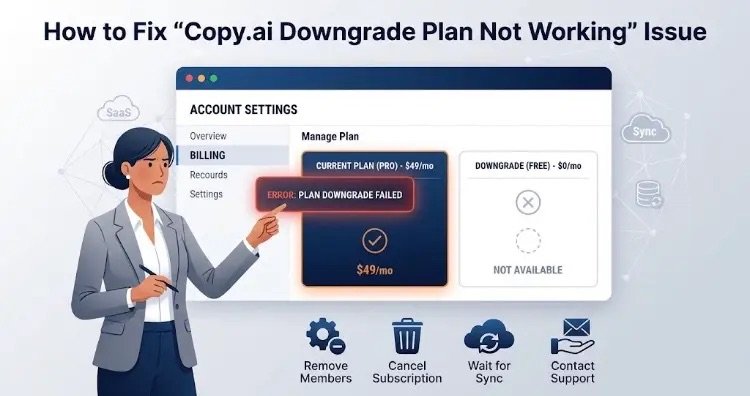
How to Delete Your Copy.ai Account: A Step-by-Step Guide
Thinking about closing your Copy.ai account? Follow this step-by-step guide to safely cancel your subscription, export your saved projects, and permanently delete your workspace and data without hidden fees.

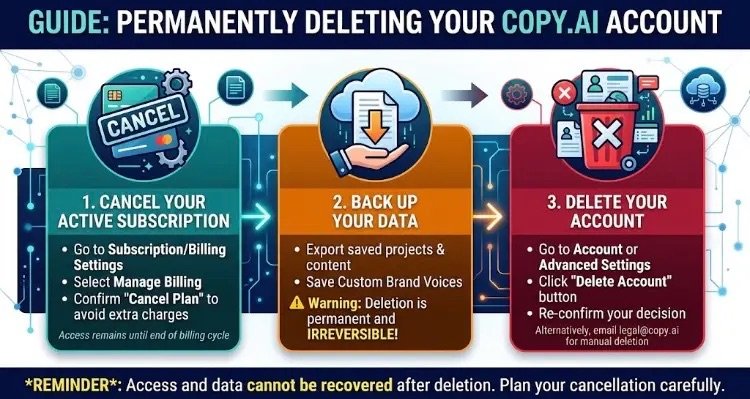
Copy.ai Account Deletion Guide: Cancel your subscription, back up your data, and permanently delete your account in 3 simple steps.
Copy.ai has become a go-to platform for creators, marketers, and teams leveraging AI-driven content creation. However, if your workflow has evolved, you’re shifting to different tools, or you simply want to minimize your digital footprint, closing your account and removing your personal data is a straightforward process when done correctly.
To ensure you don’t run into unexpected charges or lose valuable work, follow this definitive guide to safely cancelling your subscription and deleting your account.
Step 1: Cancel Your Active Subscription First
Before initiating the account deletion process, it is critical to cancel any active paid plan (such as Copy.ai Pro or Team). Simply deleting your account profile without terminating your billing agreement can sometimes lead to recurring charge errors on payment processors.
- Log In: Go to Copy.ai and sign in to your workspace.
- Access Account Settings: Click on your workspace name or profile avatar at the top left or bottom left of the dashboard.
- Navigate to Subscription: Select “Subscription” or “Billing” from the menu.
- Manage Billing: Click “Manage Billing” to open the payment portal.
- Cancel Plan: Select “Cancel Plan” and follow the on-screen prompts to confirm.
- Note: You will retain access to your paid tier features until the end of the current billing cycle, but automatic renewal will be disabled.
Step 2: Back Up Your Saved Work
Account deletion is permanent and irreversible. Once completed, you will immediately lose access to:
- All generated content and project documents
- Custom Brand Voices and Infobase knowledge blocks
- Saved prompt history and team collaboration spaces
Be sure to copy and save any critical drafts, copy blocks, or workflows to your local drive or document storage before proceeding.
Step 3: Delete Your Copy.ai Account
Once your subscription is canceled and your data is backed up, follow these steps to permanently delete your account:
- Open Settings: Click your profile icon and select “Settings” or “Advanced Settings.”
- Locate Account Deletion: Scroll to the bottom of the account management panel to find the “Delete Account” section.
- Confirm Deletion: Click “Delete Account.” You may be asked to re-type your email or confirm your decision to prevent accidental clicks. Once confirmed, your profile and associated data will be purged.
Alternative Method: Support & Data Privacy Requests
If you encounter technical issues or cannot locate the self-serve deletion button within your dashboard, you can request manual deletion directly through Copy.ai’s support channels:
- Subscription Cancellations: Email cancel@copy.ai with your account details.
- Complete Account & Data Removal (GDPR/CCPA Compliance): Send a request to legal@copy.ai asking for the permanent deletion of your account and personal data.
Frequently Asked Questions
- Will I get a refund if I delete my account mid-billing cycle? Generally, no. Copy.ai’s standard policy does not offer prorated refunds upon account cancellation or deletion unless requested within their initial refund window (typically 5 days from purchase).
- Can I restore my account later? No. Once an account is permanently deleted, all records, settings, and generated content are wiped and cannot be recovered. You will need to sign up for a brand-new account if you decide to return.